#
Cloudflare DNS Setup for Stackryze Domains
Warning
These docs are in Beta and actively updated daily. Please report if you find any issues.
This guide shows you how to use Cloudflare as your DNS provider for your Stackryze Domains subdomain.
#
Why Cloudflare?
- Free Forever: No cost for DNS hosting
- Fast Global Network: 300+ data centers worldwide
- DDoS Protection: Built-in security features
- Free SSL: Automatic HTTPS for your subdomain
- Easy to Use: Intuitive dashboard
- API Access: Automate DNS management
#
Prerequisites
Before you begin:
- ✅ Registered subdomain on domain.stackryze.com
- ✅ Cloudflare account (free) - Sign up here
Tip
If you haven't registered your subdomain yet, see our Getting Started guide first.
#
Step 1: Add Your Subdomain to Cloudflare
- Log in to your Cloudflare dashboard
- Click "Add a Site"
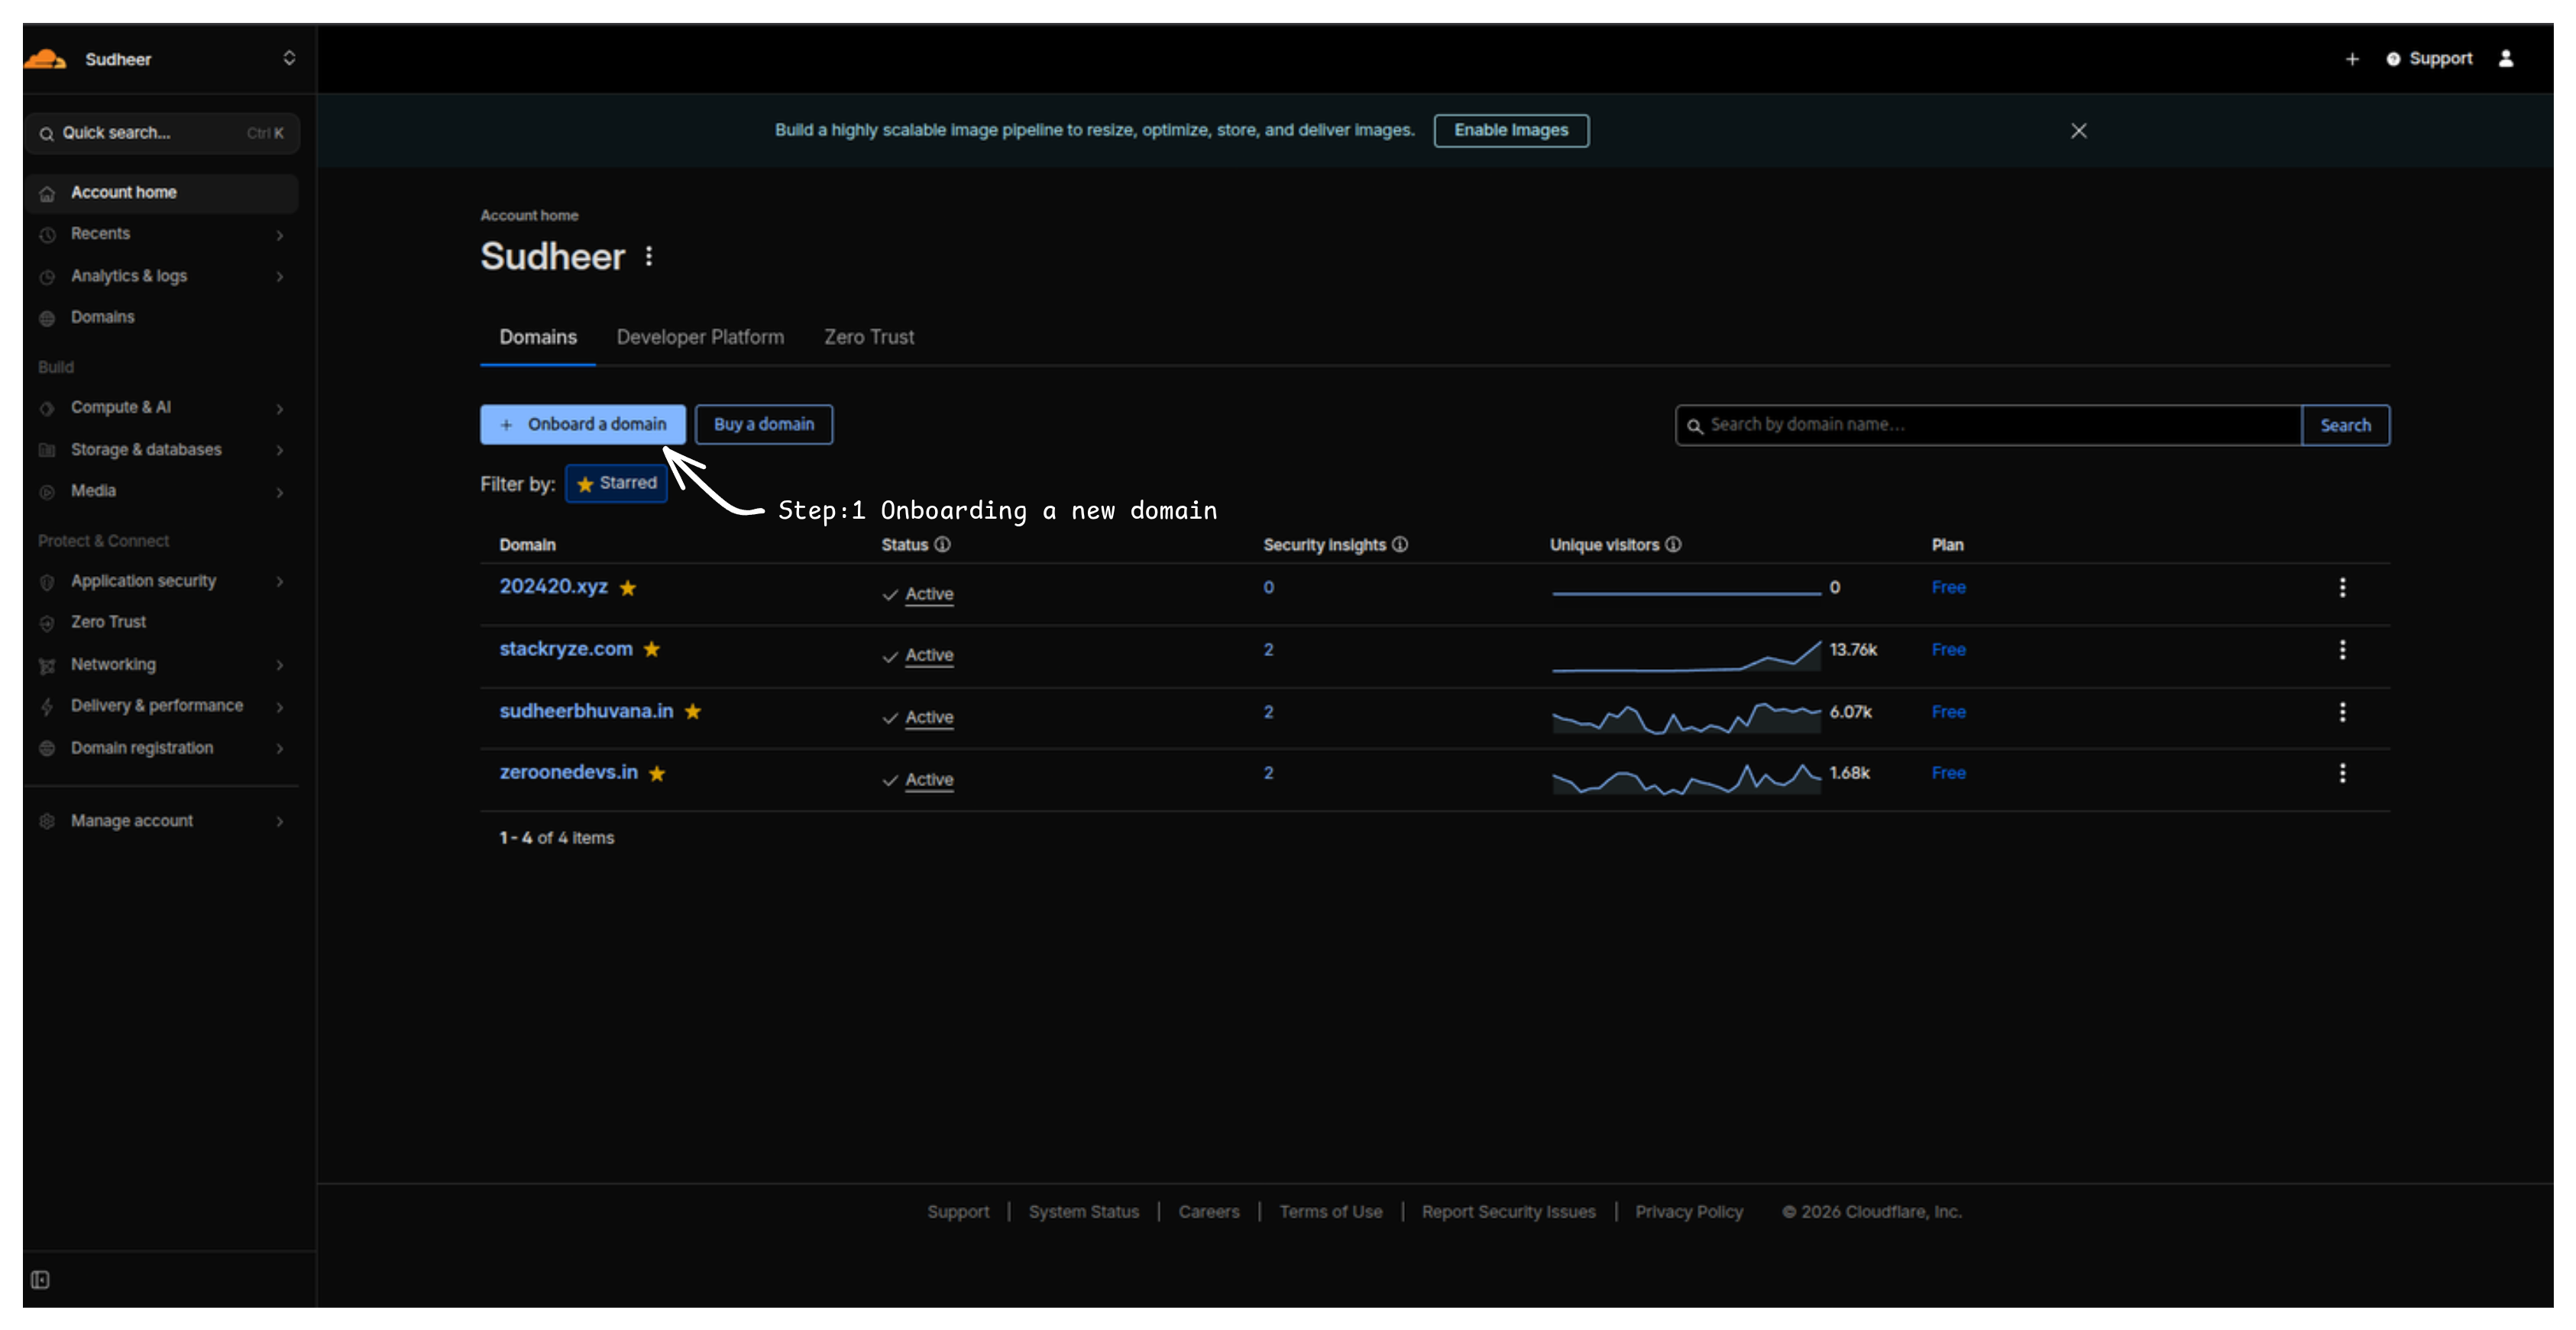
- Enter your full subdomain:
yourname.indevs.in - Click "Continue"
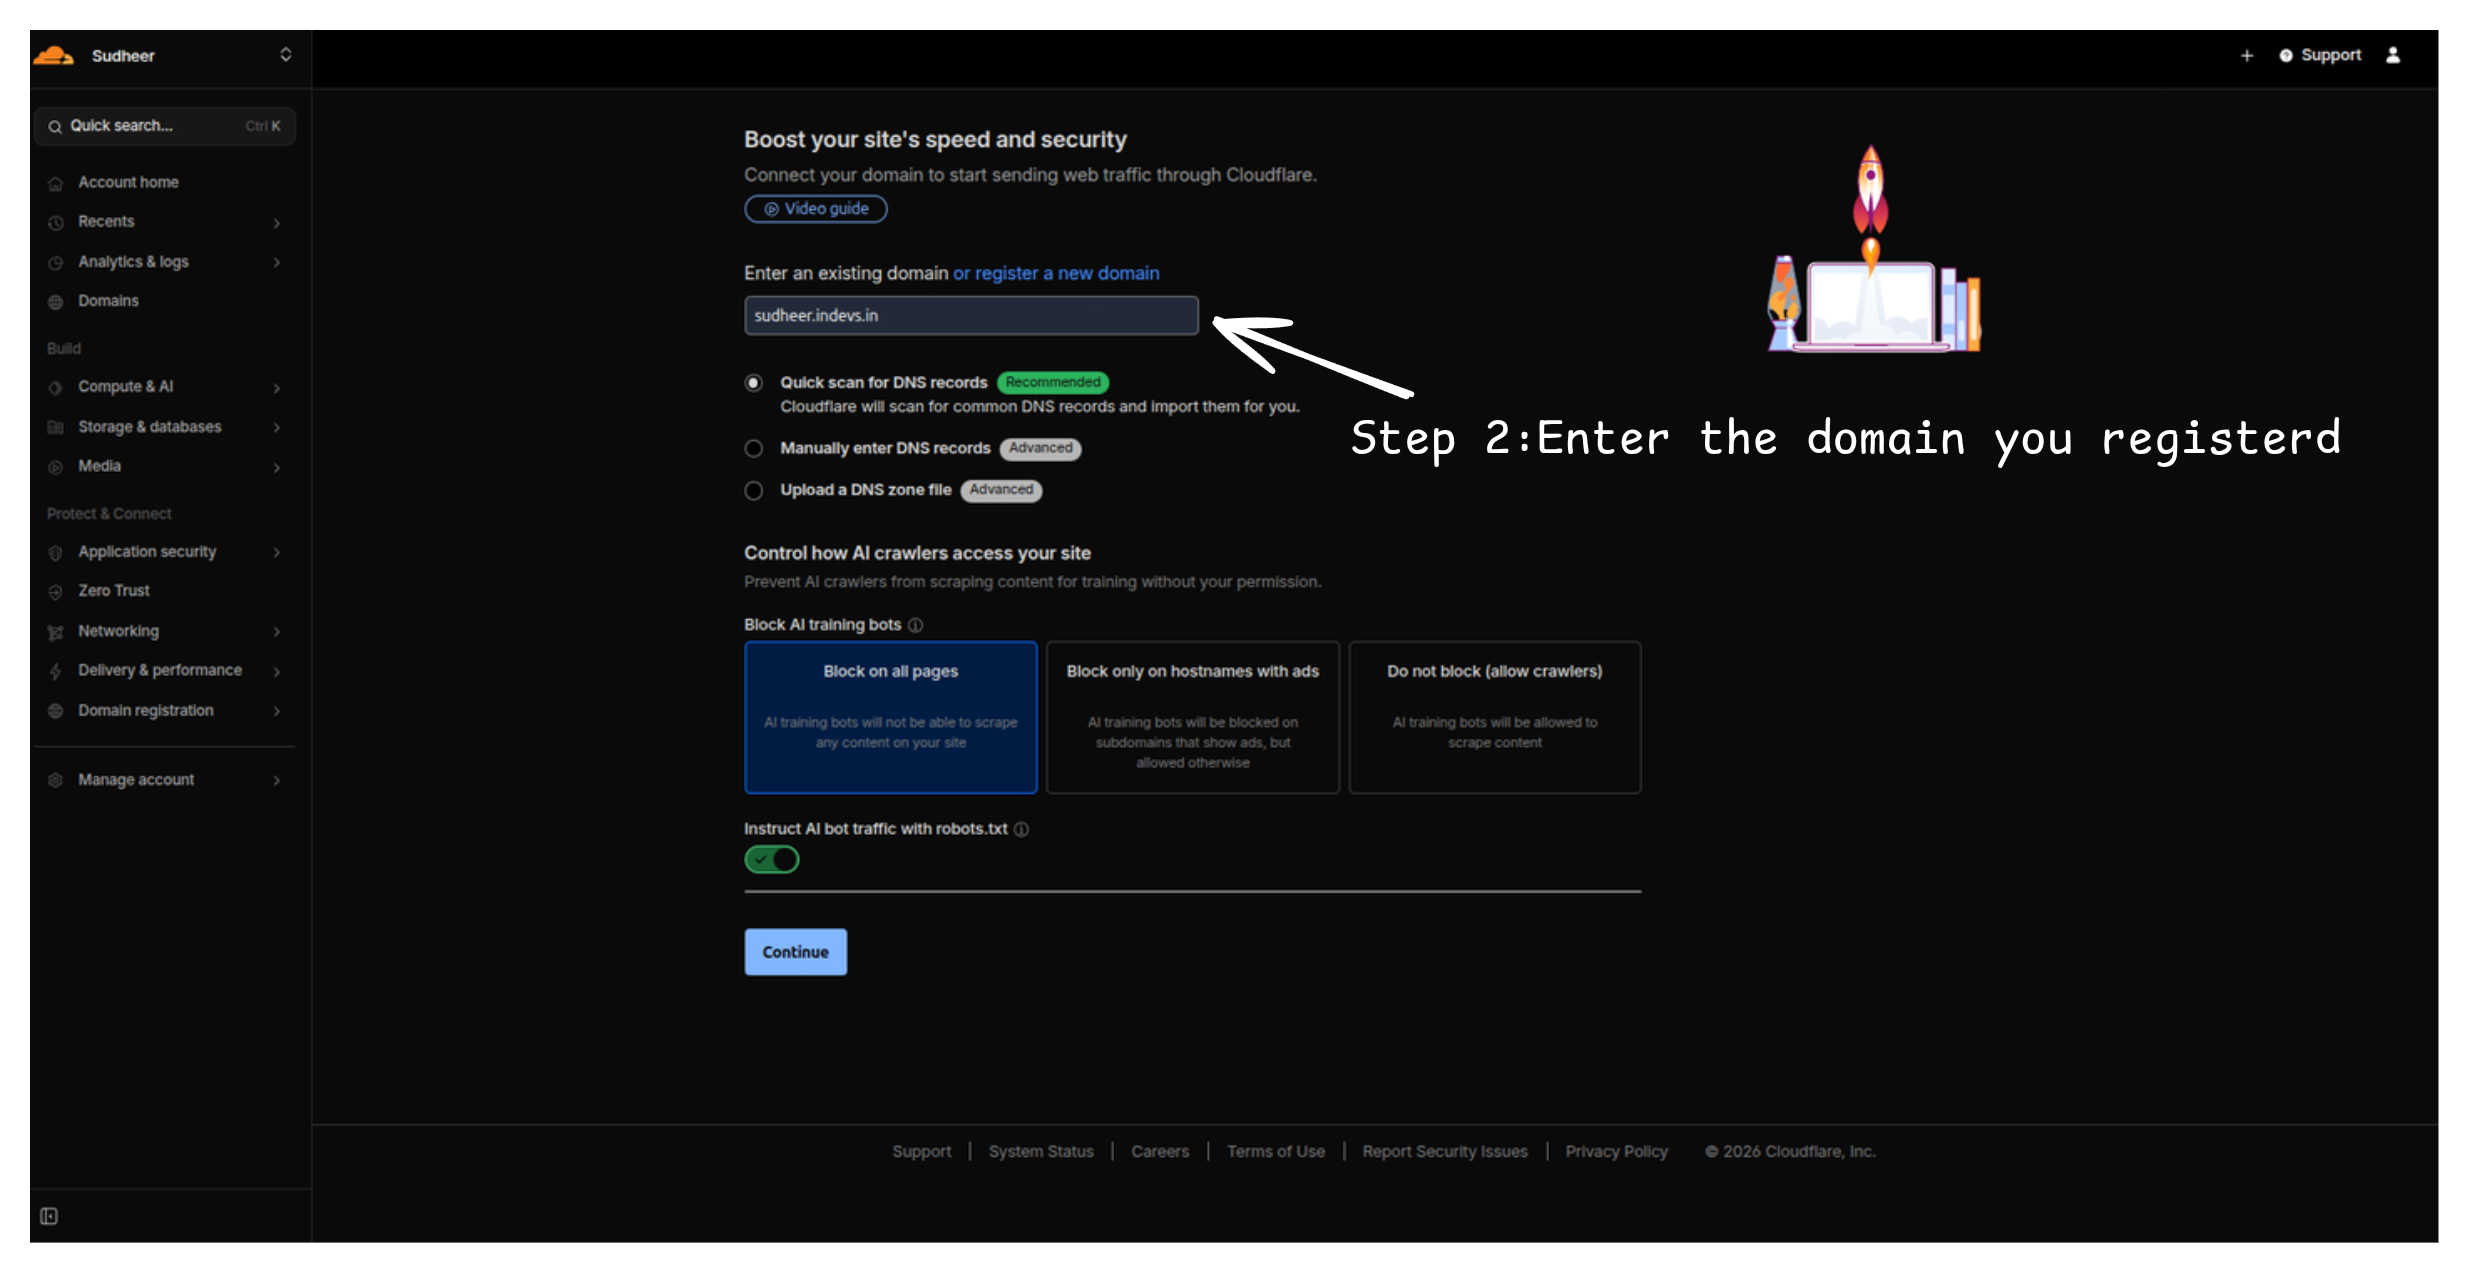
Important
Enter your complete subdomain (e.g., myproject.indevs.in), not just the base domain.
#
Step 2: Select Free Plan
- Select the Free plan
- Click "Continue"
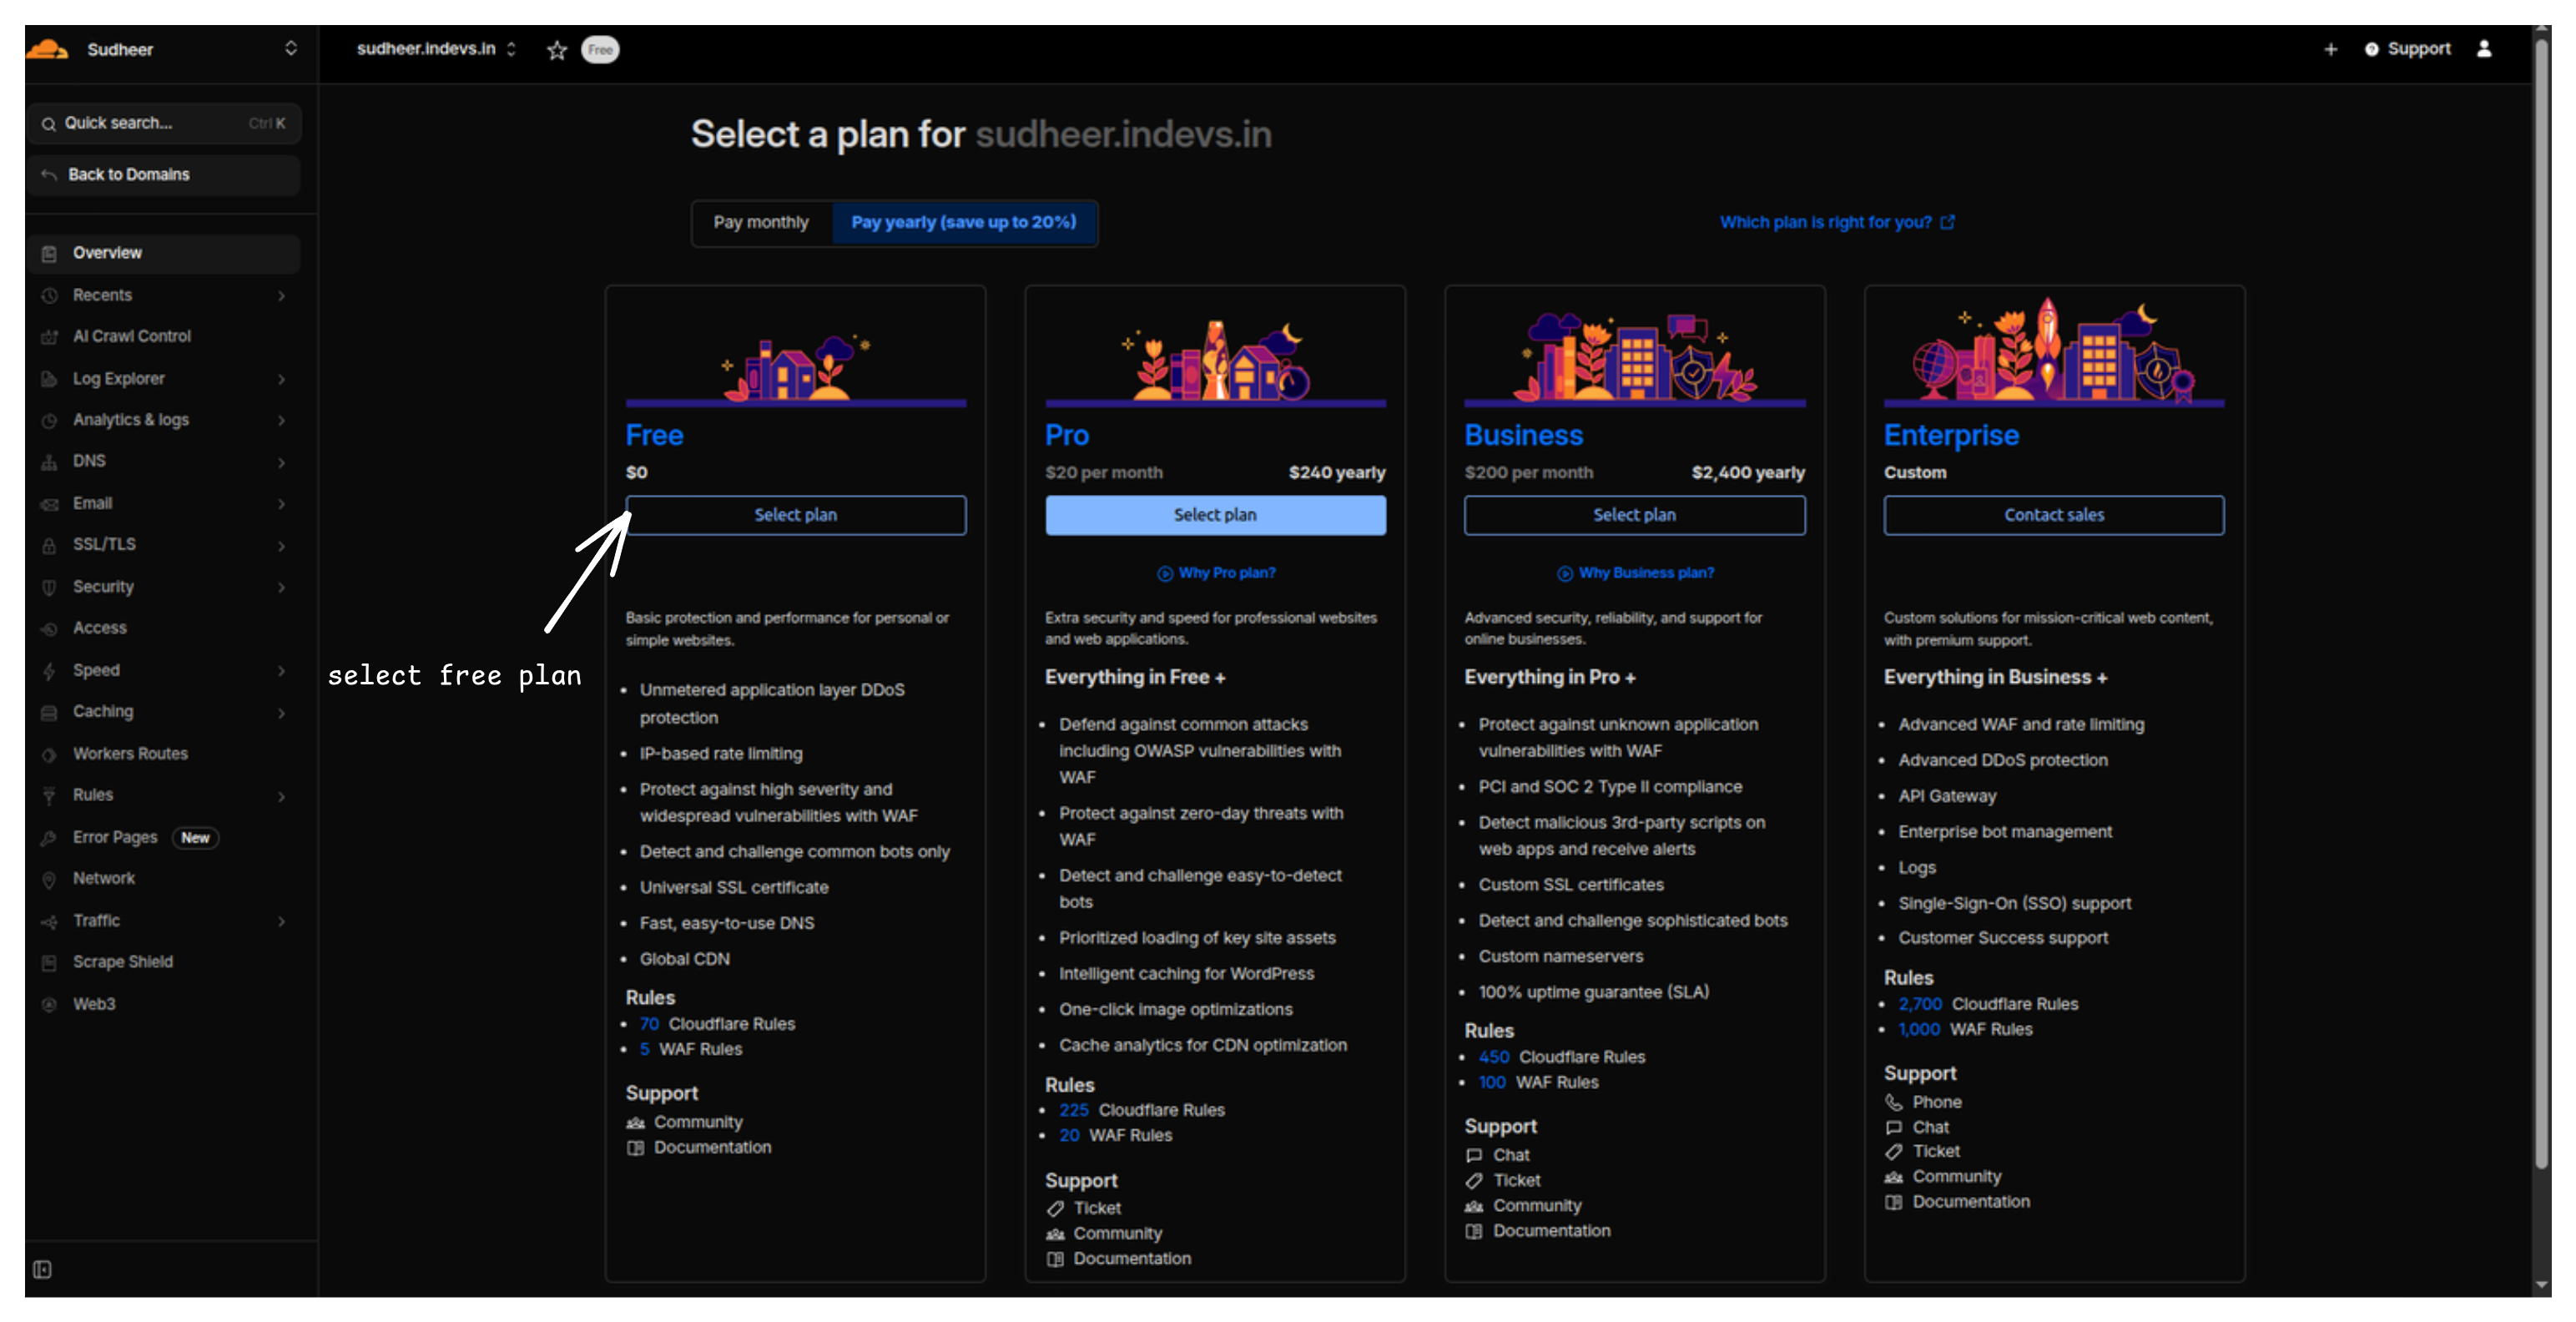
Note
The Free plan includes everything you need for DNS hosting. You can upgrade later if needed.
#
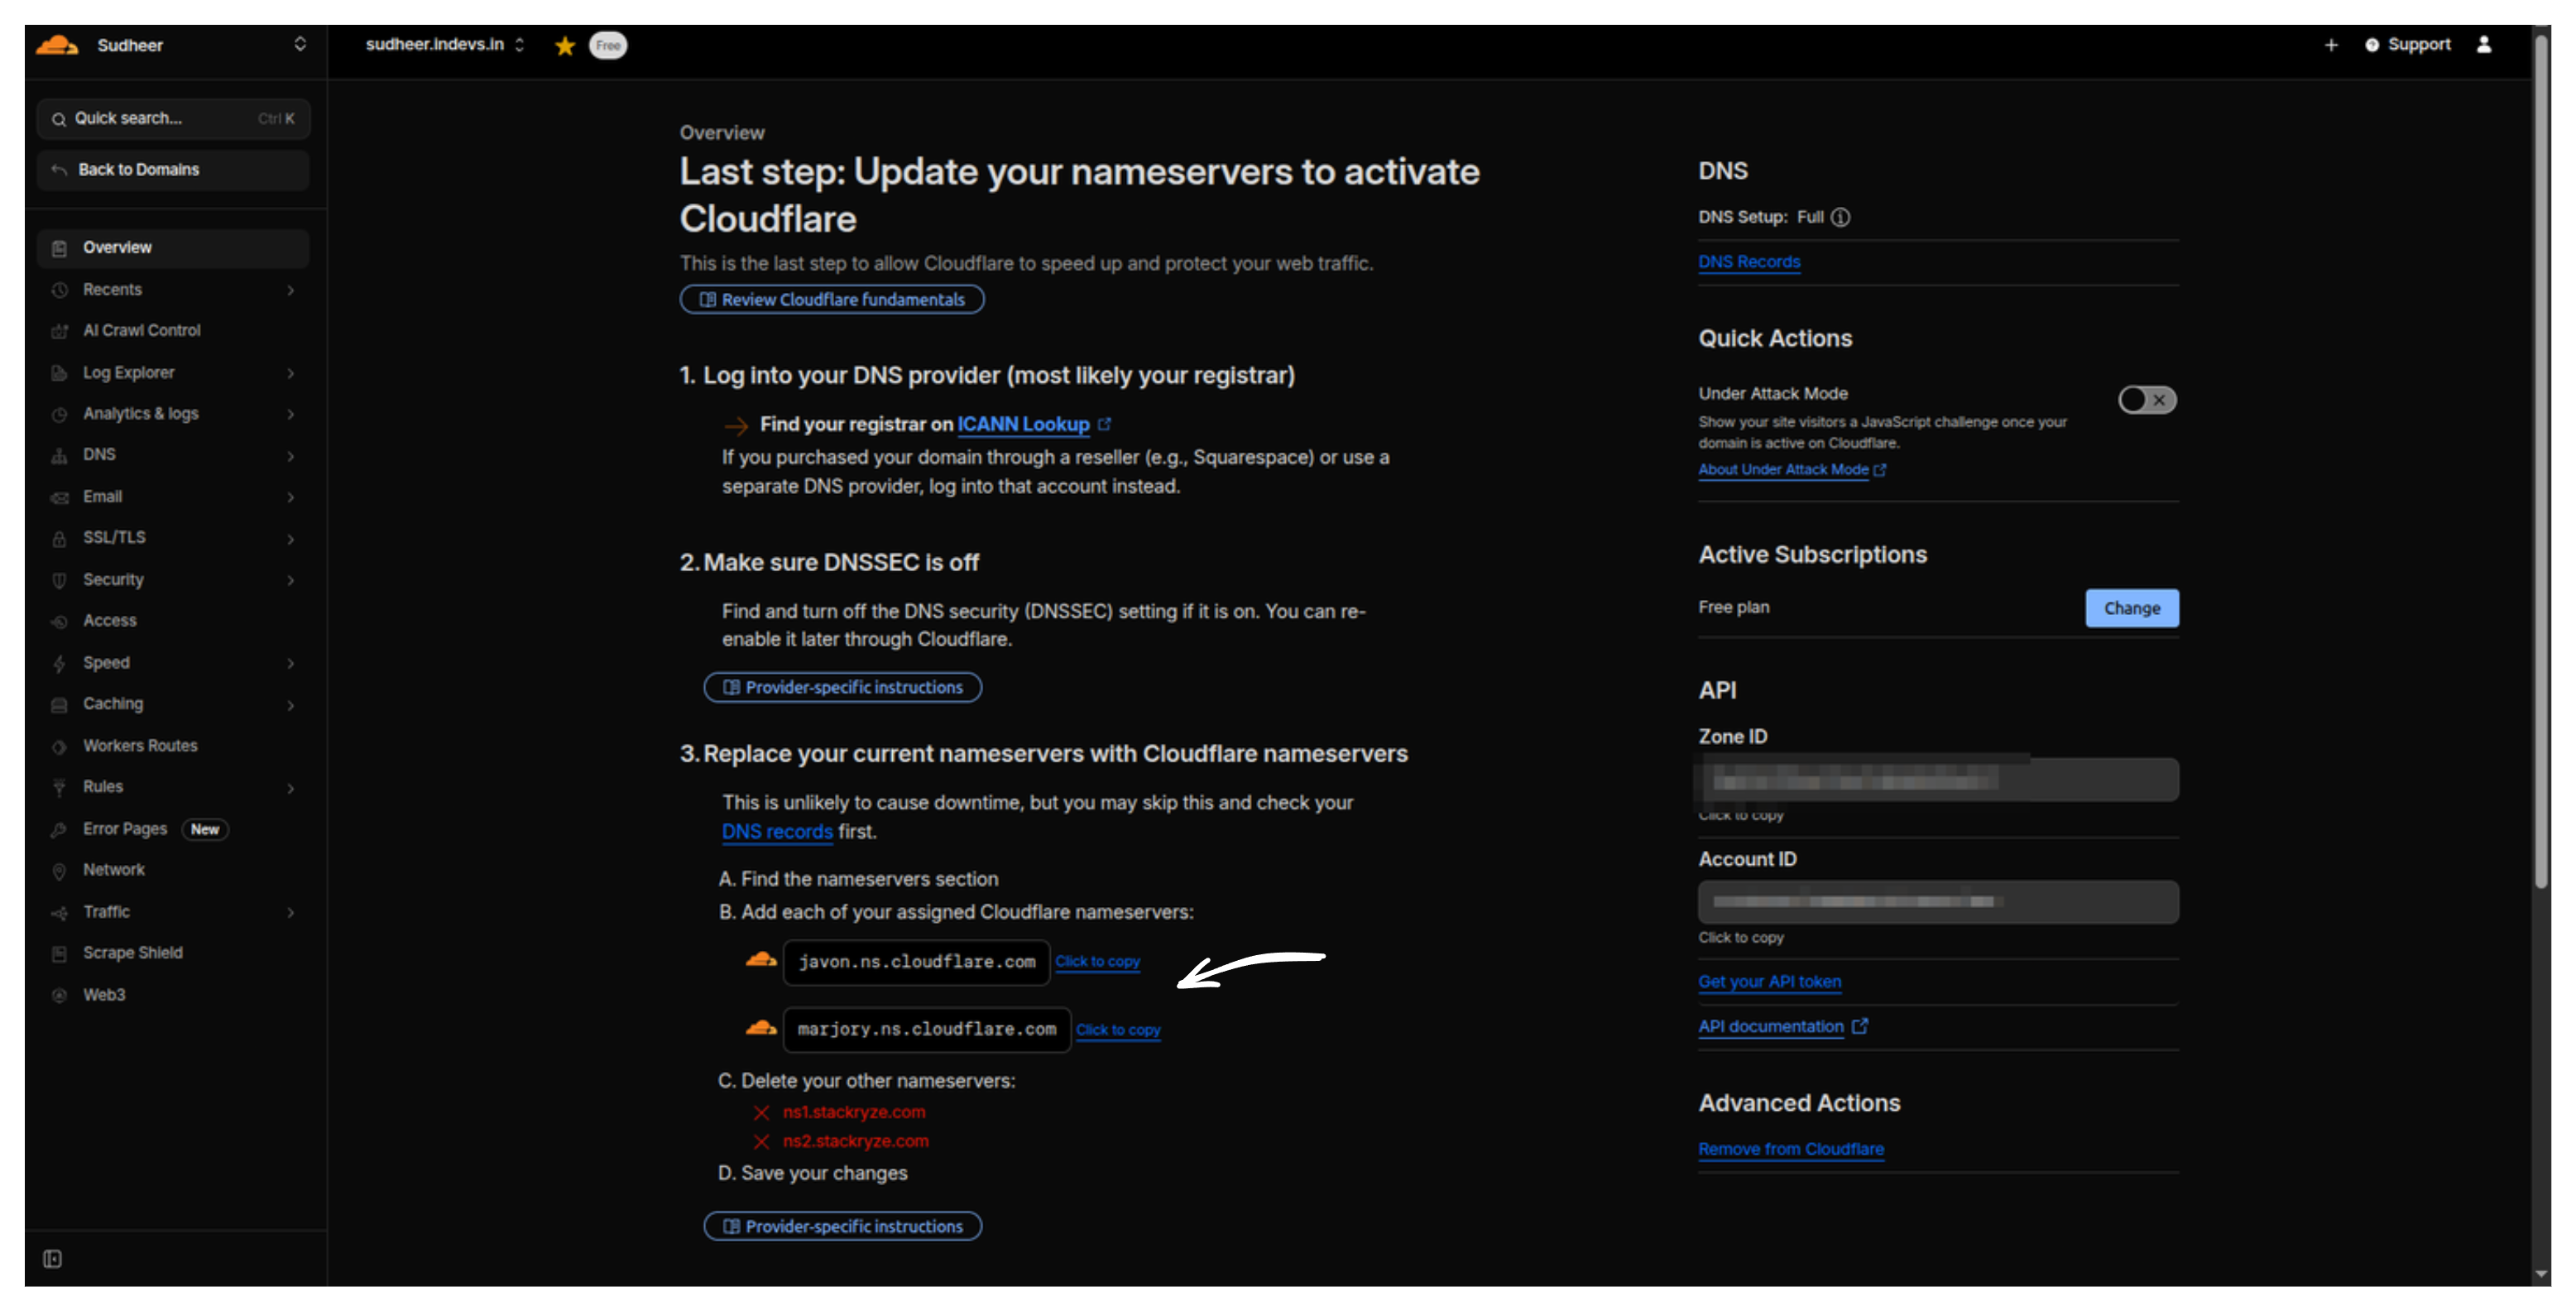
Step 3: Copy Your Cloudflare Nameservers
Cloudflare will assign unique nameservers to your domain:
- Look for the nameserver information on screen
You'll see something like:
ava.ns.cloudflare.com curt.ns.cloudflare.com- Copy both nameservers - you'll need them in the next step
Warning
Your nameservers will be different from this example. Copy the exact ones Cloudflare assigns to you.
How to find nameservers later:
- Go to DNS → Records in Cloudflare
- Scroll to the Cloudflare Nameservers section
- Or check the Overview tab
#
Step 4: Update Nameservers in Stackryze Domains
Now update your domain to use Cloudflare:
- Go to domain.stackryze.com
- Navigate to "My Domains"
- Click on your domain
- Click "Update Nameservers" or "Edit"
- Replace the nameservers with your Cloudflare ones:
- Nameserver 1:
ava.ns.cloudflare.com - Nameserver 2:
curt.ns.cloudflare.com
- Nameserver 1:
- Click "Save"
Important
DNS changes typically propagate in 5-10 minutes, but can take up to 48 hours globally.
#
Step 5: Verify Connection
- Return to your Cloudflare dashboard Overview page.
- Click "Check nameservers now" to initiate a check.
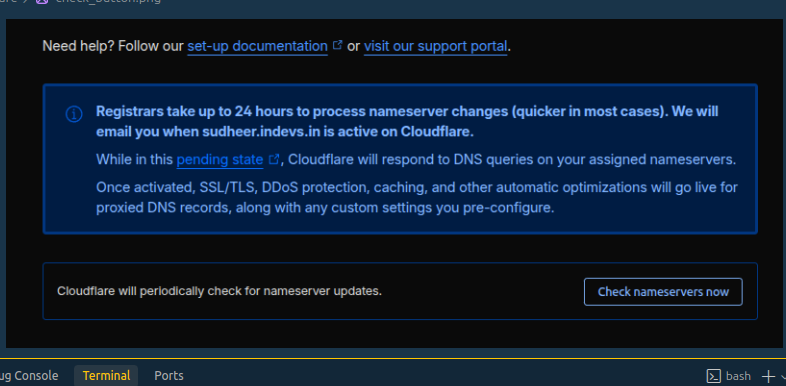
- Cloudflare will verify your nameservers. This usually takes a few minutes but can take up to 24 hours.
- Email Confirmation: Cloudflare will send you an email confirmation once your site is active.
- When successful, you will see a confirmation message:
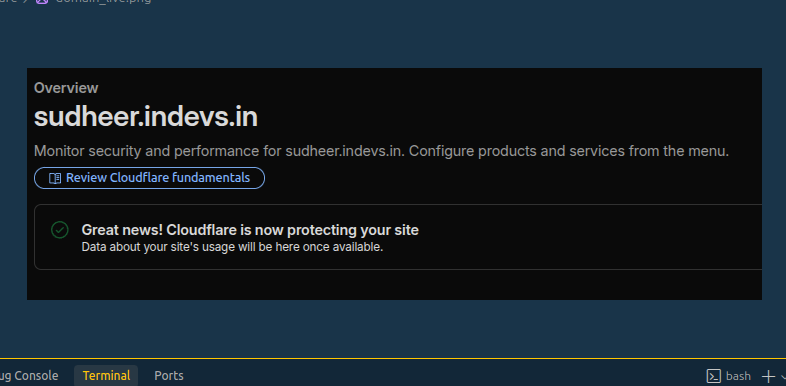
#
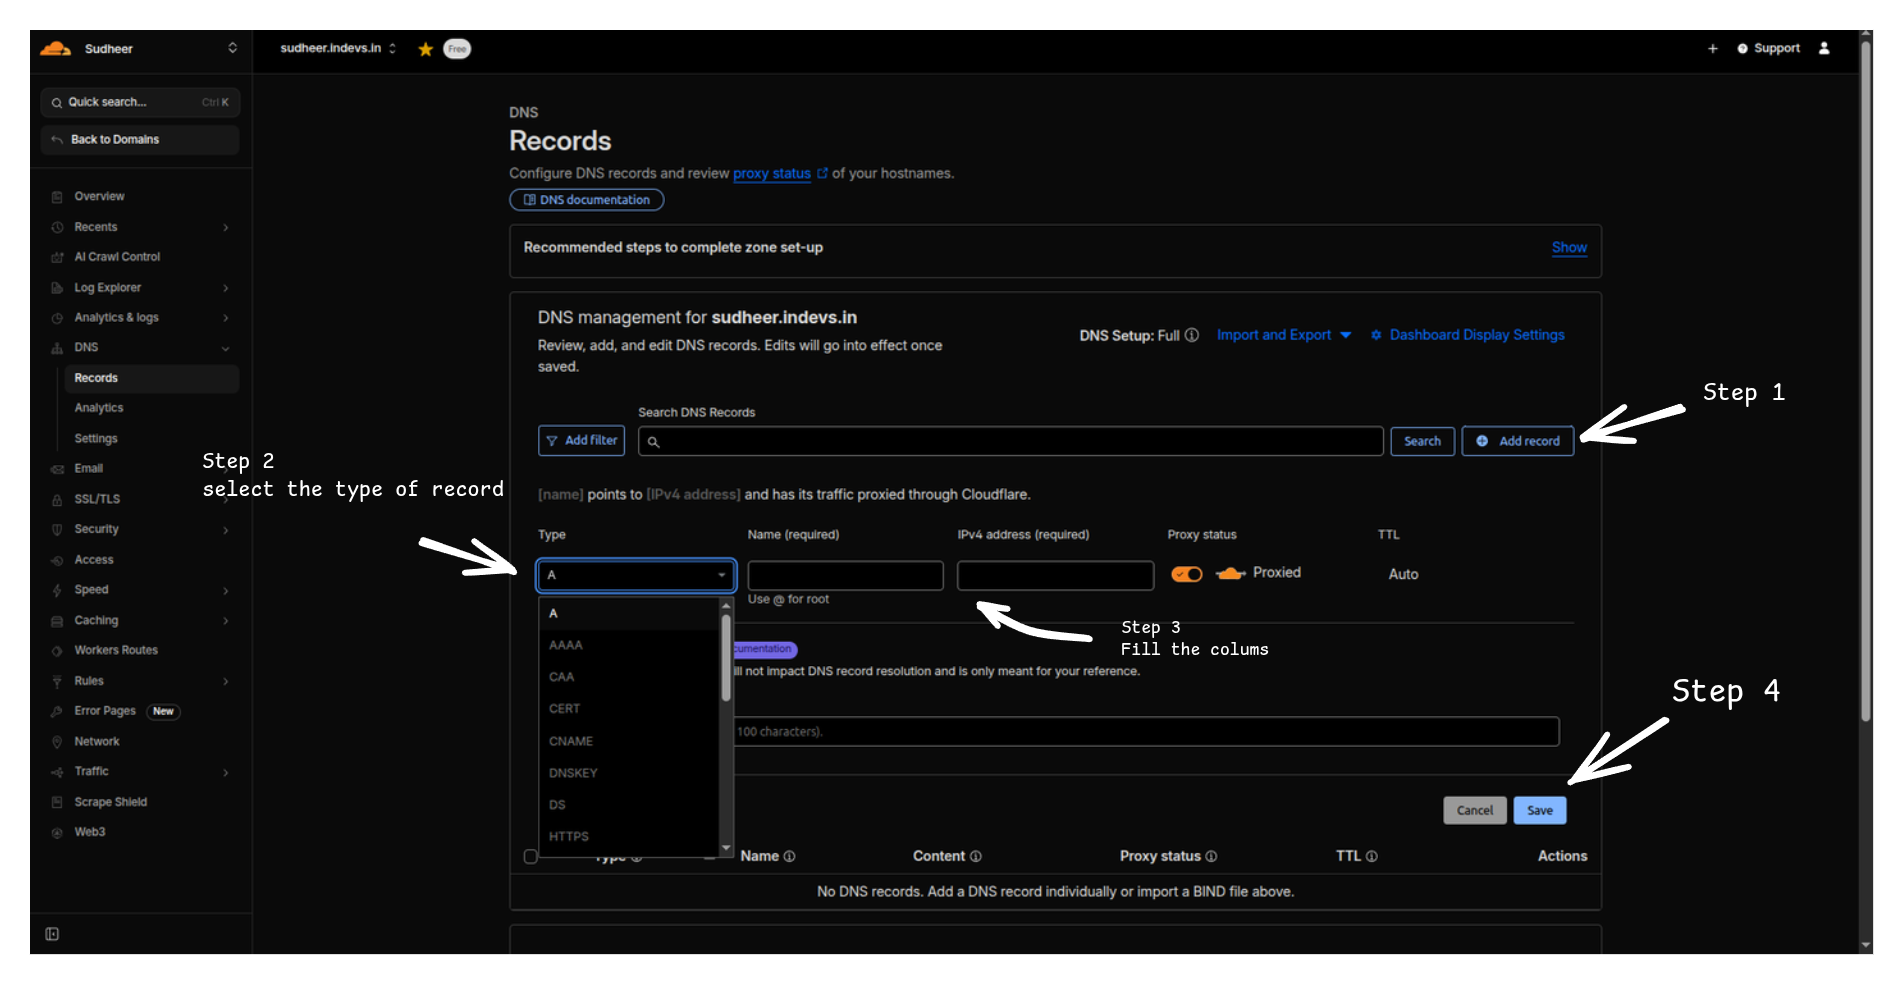
Step 6: Configure DNS Records
Now add your DNS records in Cloudflare:
- In Cloudflare, go to DNS → Records

Example: Point to GitHub Pages
- Type: CNAME
- Name: @ (or your subdomain)
- Target: yourusername.github.io
- Proxy status: DNS only (gray cloud)
- TTL: Auto
Example: Point to an IP Address
- Type: A
- Name: @
- IPv4 address: 192.0.2.1
- Proxy status: DNS only (gray cloud)
- TTL: Auto
Example: Add WWW Subdomain
- Type: CNAME
- Name: www
- Target: yourname.indevs.in
- Proxy status: DNS only (gray cloud)
- TTL: Auto
#
Step 7: Enable SSL (Optional but Recommended)
Once your domain is live:
- In Cloudflare, go to SSL/TLS
- Set SSL mode to Full or Full (strict)
- Enable Always Use HTTPS
Tip
SSL certificates are automatically provisioned. This can take up to 24 hours.
#
Cloudflare Features
#
Proxy Status (Orange Cloud vs Gray Cloud)
Gray Cloud (DNS Only) - Recommended initially
- DNS resolution only
- No Cloudflare caching or protection
- Required for some services (email, etc.)
Orange Cloud (Proxied) - Optional
- Traffic goes through Cloudflare
- DDoS protection and caching
- May cause issues with some services
Important
Start with gray cloud (DNS only) until your domain is working, then experiment with proxying if needed.
#
Common Issues
#
Nameservers Not Showing
Solution: Wait a few minutes after adding your site. Cloudflare needs to provision nameservers.
#
DNS Not Resolving
Solution:
- Verify nameservers are correctly updated in your Stackryze dashboard
- Wait 5-10 minutes for DNS propagation
- Check DNS records in Cloudflare
- Use DNS Checker to verify
#
SSL Errors
Solution:
- Ensure your origin server supports HTTPS
- Set SSL mode to Flexible if your origin doesn't have SSL
- Wait up to 24 hours for certificate provisioning
#
Domain Not Working After Setup
Solution:
- Verify nameservers in Stackryze dashboard match Cloudflare
- Check DNS records in Cloudflare
- Clear browser and DNS cache
- Wait up to 48 hours for full propagation
#
Advanced Features
- Page Rules: Custom caching, redirects, and more
- Workers: Serverless code at the edge
- Analytics: Traffic statistics and insights
- API Access: Automate DNS management
#
Additional Resources
Need help? Join our Discord for live help or contact us at [email protected]